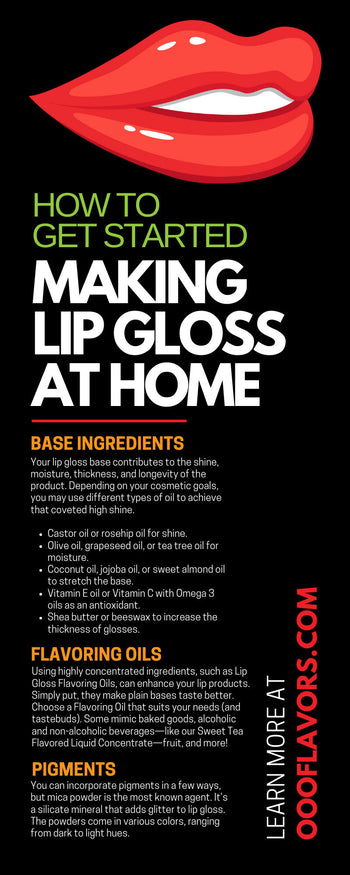
To make lip gloss at home, gently melt a cosmetic gloss base, stir in a carrier oil for slip, add a lip-safe flavoring and a lip-approved colorant, then fill your tubes while the mixture is still fluid and let it set at room temperature. A single tablespoon of base fills roughly two 5 ml tubes.
The process takes about twenty minutes. Getting it right — a gloss that doesn't separate, doesn't sting, and is legal to sell — takes a little more care, and that's most of what this guide covers.
What You Need
| Component | What it does | Typical amount |
|---|---|---|
| Gloss base | Structure, shine, cling | 1 tbsp per 2 tubes |
| Carrier oil | Slip, moisture, thins the base | 1/4–1 tsp per tbsp of base |
| Flavoring | Scent and taste | 2–3 drops per tbsp of base |
| Colorant | Tint and shimmer | Small pinch — start tiny |
| Tools | Small heatproof bowl, spatula, pipettes, digital scale | — |
| Containers | Squeeze tubes, doe-foot wands, or pots | 5 ml or 10 ml |
On the base: most beginners start with a clear, ready-made gloss base - ours is Get Puckered Gloss Base - because it removes the hardest part of the formulation. Building a base from scratch means balancing waxes, butters, and oils to hit the right viscosity, which takes many failed batches to learn.
On carrier oils: castor oil is the traditional choice because it's viscous and gives that glassy, high-shine finish. Jojoba is lighter and absorbs faster. Fractionated coconut (MCT) oil is very thin and stays liquid indefinitely. Coconut oil in its solid form is a poor choice - it melts at body temperature and makes gloss grainy as it recrystallizes.
On flavorings: use only flavors your supplier confirms are appropriate for lip application, and keep the dose low. Concentrated flavorings at high percentages can irritate lips, and citrus and mint profiles in particular can sting or tingle. Two to three drops per tablespoon is plenty. You can request COAs and safety documentation for any flavor before you formulate with it.
The Colorant Rule Most DIY Guides Skip
Not every cosmetic mica is approved for use on lips.
In the U.S., color additives are regulated by the FDA and approved for specific uses - some are permitted in cosmetics generally but not in products applied to the lips or near the eyes. A pigment that's fine in a bath bomb or soap may not be legal, or safe, in something you're going to eat off your own face over the course of a day.
Before you buy a colorant, check the supplier's listing for explicit "lip safe" or "approved for use in lip products" language, and confirm the FD&C or D&C number. If a supplier can't tell you, that's your answer.
Practical dosing: start with an amount you can barely see on the end of a toothpick. Mica is far more powerful in a translucent base than it looks in the jar, and over-pigmented gloss goes chalky and drags on the lips.
Step-by-Step: Making Your First Batch
Yield: about 2 tubes (5 ml each). Time: 20 minutes plus setting.
1. Sanitize everything
Wipe all tools, work surfaces, and the inside of your containers with 70% isopropyl alcohol and let them air-dry completely. Lip gloss is anhydrous - it contains no water - which is why it doesn't need a preservative. It also means any water you introduce has nowhere to go and becomes a place for bacteria to grow. Dry tools, dry containers, every time.
2. Melt the base
Weigh 1 tablespoon (roughly 14 g) of gloss base into a small heatproof bowl. Microwave in 10-second bursts, stirring between each, until just melted and pourable. Do not let it bubble or simmer - overheating degrades the base and can make the finished gloss cloudy or thin.
3. Stir in the carrier oil
Add 1/4 to 1 teaspoon of carrier oil and stir until fully combined. More oil means a thinner, glossier, shorter-wearing product. Less means thicker and more cushioned. This is the single lever that most changes how your gloss feels, so it's worth making three small test batches at different ratios.
4. Let it cool slightly, then add flavor and color
Wait about a minute. Adding flavoring to very hot base drives off the top notes — the same reason you don't flavor chocolate at melting temperature.
Add 2–3 drops of flavoring and a small pinch of colorant. Stir slowly and thoroughly for a full 30–60 seconds. Stirring fast whips in air bubbles that get trapped as the gloss sets.
5. Test the color on skin, not in the bowl
Dab a small amount on the back of your hand. Color always looks more intense in a bowl than it does in a thin layer on lips. Adjust before you fill.
6. Fill the containers
Use a pipette or a small piping bag and fill while the mixture is still fluid. Fill slowly from the bottom to avoid air pockets. Leave a few millimeters of headroom.
7. Set at room temperature
Leave the tubes upright and undisturbed for 1–2 hours. Don't refrigerate — rapid cooling can cause the oils to separate or the surface to go grainy.
8. Label
Even for gifts, note the flavor, the batch date, and the ingredients. If anyone ever reacts to a batch, you'll want that record.
Troubleshooting
| Problem | Cause | Fix |
|---|---|---|
| Gloss is too thick and drags | Not enough carrier oil | Re-melt, add oil 1/4 tsp at a time |
| Runs off the lips, no cling | Too much carrier oil | Re-melt with additional base |
| Grainy or gritty texture | Cooled too fast, or solid coconut oil used | Re-melt slowly, cool at room temp, switch oils |
| Cloudy appearance | Overheated base, or moisture got in | Start fresh with dry tools |
| Oil pooling at the top | Oil and base didn't emulsify | Re-melt and stir longer at temperature |
| Air bubbles trapped inside | Stirred too vigorously, or filled too fast | Stir slowly; fill from the bottom |
| Stings or tingles on the lips | Flavor overdosed, or an irritant profile | Cut the dose; avoid strong mint and citrus |
| Flavor faded within days | Added while base was too hot | Add after cooling one minute |
Customizing Your Gloss
Layer two flavors. Use roughly two-thirds of a normal dose of each rather than a full dose of both. Strawberry + vanilla, coconut + lime, and cocoa + hazelnut all read as more finished than a single note.
Adjust the finish. More carrier oil gives high shine and light wear; less gives a plush, balm-like cushion. A small amount of lip-safe shimmer mica catches light without adding visible color.
Match the season. Lighter, fruit-forward flavors sell in summer; bakery and spice profiles in autumn. If you're producing for markets, plan flavors about eight weeks ahead of the season.
Browse the full A–Z flavor list or start with Baked Goods & Sweets and Fruits and Nuts.
If You Plan to Sell: MoCRA Applies to You
This is the part that has changed most since the last version of this guide, and it catches a lot of small makers by surprise.
The Modernization of Cosmetics Regulation Act of 2022 (MoCRA) was the first major overhaul of U.S. cosmetics law since 1938, and lip gloss is unambiguously a cosmetic. Under MoCRA, businesses that manufacture, pack, or distribute cosmetics in the U.S. are generally required to register their facility with the FDA, list each product including its ingredients, report serious adverse events, and keep safety substantiation records.
Key points as of mid-2026:
- The compliance deadlines have already passed. MoCRA took effect in December 2023 and requirements phased in from there. If you're selling in 2026 and haven't registered, industry guidance is to register now rather than wait — it's the simplest way to demonstrate good faith.
- Facility registrations renew every two years, and product listings must be updated annually by the "responsible person" — whoever's name appears on the label.
- A small business exemption exists. If your average gross annual U.S. cosmetic sales over the previous three years are under $1 million, you may qualify for exemption from facility registration, product listing, and future GMP requirements. Note that the exemption does not extend to certain product categories, including products that regularly contact the mucus membrane of the eye.
- GMP rules are still pending. MoCRA directed the FDA to issue binding Good Manufacturing Practice regulations for cosmetics; as of mid-2026 that final rule had not been published. Attorneys at Foley & Lardner have advised companies to treat the interim as preparation time rather than a reprieve.
- Fragrance allergen labeling is coming. MoCRA requires the FDA to identify fragrance allergens that must be disclosed on labels. As of January 2026 those regulations hadn't been issued, but when they arrive many products will need label changes. Keep good records of what's in your flavor and fragrance components now so you aren't reverse-engineering it later.
None of this is legal advice, and enforcement posture is still developing. If you're moving from hobby to business, a consultation with a cosmetics regulatory specialist is worth the cost. Start at the FDA's small business and homemade cosmetics fact sheet.
If you're scaling up, our wholesale program offers bulk flavor sizing.
Frequently Asked Questions
Can I use food flavoring in lip gloss?
Only if the supplier confirms it's suitable for lip application. Food-grade and lip-safe are related but not identical standards — a flavor can be safe to eat and still be a poor choice at concentration on delicate lip skin. Check the documentation before you formulate.
How long does homemade lip gloss last?
Anhydrous gloss made with dry tools typically keeps 6–12 months. The limiting factor is oil rancidity, not bacteria. Castor and jojoba are relatively stable; oils high in polyunsaturated fats go off faster. Store away from heat and direct light, and discard anything that smells crayon-like or waxy.
Does homemade lip gloss need a preservative?
Not if it's genuinely water-free. Preservatives protect against microbial growth in water, and there's no water phase in a standard oil-and-base gloss. The moment you add anything water-containing — aloe juice, hydrosol, fruit purée — you need a broad-spectrum preservative and a different formulation entirely.
Why does my lip gloss feel sticky?
Castor oil is naturally tacky, and that stickiness is what makes gloss cling. If it's too much, replace part of the castor with jojoba or MCT oil. Don't eliminate it entirely or you'll lose the shine.
Can I add sweetener to lip gloss?
You can, but consider whether you should. Sweetened gloss encourages licking, which removes the product faster and can chap lips over time. Most flavorings read as "sweet" through aroma alone without any sweetener present.
How much does it cost to make lip gloss at home?
Base, oil, flavoring, colorant, and a tube typically land somewhere in the $1–3 per unit range at hobby quantities, dropping meaningfully with bulk buying. The main variable is packaging, not ingredients.
What's the best flavor for beginners?
Vanilla, strawberry, and coconut. All three are well-tolerated, non-irritating, and forgiving if you slightly overdose them. Save mint, cinnamon, and strong citrus for after you've calibrated your dosing.
Start Your First Batch
One tablespoon of base, a teaspoon of oil, three drops of flavor, dry tools. That's a batch.
Shop flavors for lip products →
Questions about a specific flavor's suitability for lip applications? Email info@oooflavors.com or request product documentation.